As a former second grade teacher, my favorite part of my classroom was my classroom library. By my 8th year of teaching, I had collected over 2,500 books for my students! I loved reading books out loud to my students and helping them find new books to get lost in.
Now, as a school counselor, I continue to use children's books on a regular basis. I enjoy finding books with a strong message that students can connect with, learn from, and apply to their own lives. I frequently use books in my classroom lessons and small groups. I even use books with during individual counseling and we sit side-by-side on my couch to read and discuss how a book applies to the student's life. Because organization and efficiency are my jam, I keep all of my books organized in my office. Keep reading to learn how you can organize your own school counseling library!
Step 1: Sort Your Books
The first step to create an organized school counseling library is to sort all of your books. To begin this process as a new counselor, I borrowed a kindergarten teacher's classroom because I needed a wide, open space. I started by choosing about 10 categories that I knew I had a lot of books for and wrote the categories on Post-It notes. I took my bins of books and began sorting them into piles as I matched them by theme. As I sorted, I took the time to skim any of the books that I was not as familiar with because I wanted to make sure they were all sorted appropriately. When I started finding books that did not match up with my Post-Its, I began creating sub-piles with similar themes. In the end, I had 20 piles of books that were matched by theme!
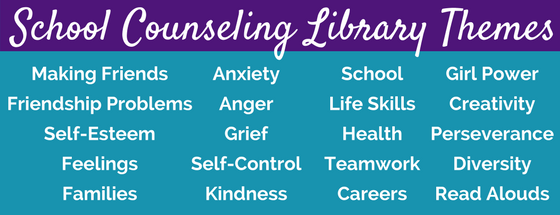
School Counseling Library Themes
Here are the 20 themes that I use in my counseling library. Many are self-explanatory, but here is a quick description of each category:
1) Making Friends: Books about social skills related to friendships
2) Friendship Problems: Books about conflict resolution, bullying, and gossip
3) Self-Esteem: Books about individuality and boosting self-esteem
4) Feelings: Books about feelings that do not match my other specific feelings categories
5) Families: Books about divorce, new siblings, and family conflicts
6) Anxiety: Books about anxious feelings and coping skills
7) Anger: Books about angry feelings and coping skills
8) Grief: Books about the loss of a friend, family member, or pet
9) Self-Control: Books about managing impulses
10) Kindness: Books about treating others with kindness and respect
11) School: Books about new students, school anxiety, and other school-related issues
12) Life Skills: Books about character traits and manners
13) Health: Books about illnesses, lice, hygiene, and other health-related issues
14) Teamwork: Books about working together
15) Careers: Books about career options
16) Girl Power: Books specific to common girl issues such as self-esteem and friendship drama
17) Creativity: Books about thinking outside of the box
18) Perseverance: Books about not giving up
19) Diversity: Books about individuality and cultures
20) Read Alouds: Books not specifically related to counseling, but are fun to read aloud during Right to Read Week and other special school events
Step 2: Catalog Your Books
There are many websites and apps that you can use to catalog your books, but my favorite is Library Thing. Here is why I love it:
-You can add books by typing in the title and Library Thing will pull the rest of the info for you
-You can use a book scanner to easily add a large amount of books
-You can organize your books by category
-You can browse your categories by book cover to quickly find the book you are looking for
-You can "tag" books to break down your categories. For example, the "friendship problems" category may have tags for bullying, conflict resolution, gossip, etc.
-You have the ability to track and lend your books (I don't use this feature, but it would be helpful if you loan out a lot of books)
-You can log 200 books for free or pay $10 per year or $25 for life. I used the $25 deal because it is worth it!
If you want to check out how I organized my books on Library Thing, click on this link! Use the drop-down menu on the left to choose a category and browse some of my favorite books.
Step 3: Design Your Library
The next step is to figure out how you would like to design your library in your office. My office is fairly small, so I keep all of my books on a tall, wooden bookshelf. On the top shelf, I store all of my counseling resource books. On the rest of the shelves, I have my books sorted into bins by categories.
I have two types of bins on my bookshelf. Near the top, I have these neon bins from Really Good Stuff. They are a bit pricier, however, I bought these when I was a classroom teacher and they have held up really well. I love how they come with a clip-on label to easily add your book category. A less expensive option are these Storex bins, which can also be found on Amazon.
I have two types of bins on my bookshelf. Near the top, I have these neon bins from Really Good Stuff. They are a bit pricier, however, I bought these when I was a classroom teacher and they have held up really well. I love how they come with a clip-on label to easily add your book category. A less expensive option are these Storex bins, which can also be found on Amazon.
The narrow bins above are great for the categories where I have less than 20 books. For my larger categories, I use wider plastic baskets (about 13" X 10"). My bins are similar to this 6-pack from Sterelite, but you can also snag these baskets for a great price at stores like Target or Wal-Mart.
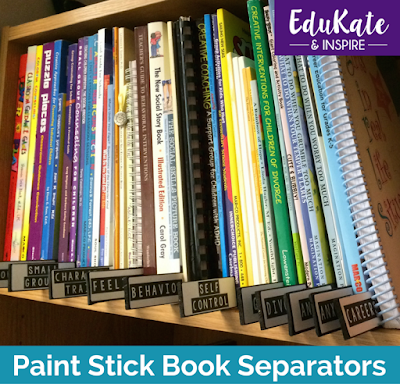
On the top shelf of my counseling library, I store all of my counseling resource books. They are organized into categories that are separated by paint stirring sticks! Here's how I made the book separators:
1) Go to Lowes or Home Depot. Tell them you are a school counselor and would love a donation of paint sticks for a project! :)
2) Place the paint sticks in a cardboard box and spray paint them black. Wait 1 hour, flip them over, and spray paint the other side.
3) Download the Avery Label Template and type in your counseling resource topics.
4) Print your topics on Avery mailing labels.
5) Stick the labels onto the ends of each paint stirrer. Mine have held great for 2 years, but it looks like I may need to put a piece of clear packing tape over each sticker this year to secure them better.
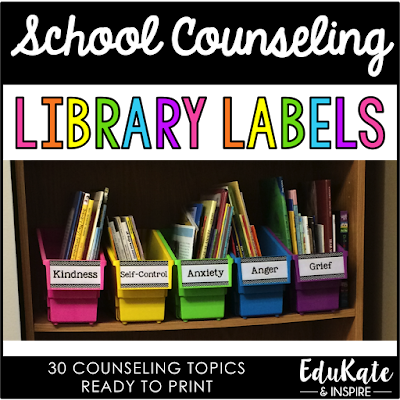
The next step in organization is to design labels for all of your baskets! If you use baskets that are a similar size as mine, I went ahead and did the work for you! :) Click on the resource below to download your FREE School Counseling Library Labels!
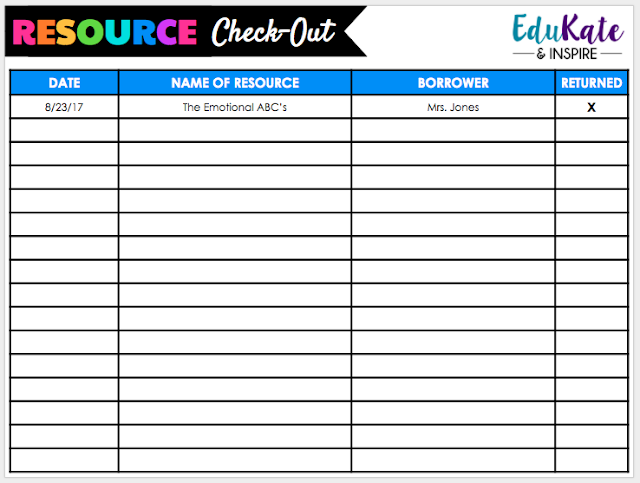
One great thing about having an organized library is that it is very easy to loan out books to students or parents! I can quickly grab a book during a parent meeting and let a family borrow it for a week or two. I also find that students like to peek at the categories of books when they are in my office, and when they get curious, I ask if they want to borrow a book from me. To help me keep track of the books I loan out, I use a page in my Digital Counseling Binder, which is a Google Slides file that I use to organize my counseling life! Here is a peek at the slide:
I hope this post helped you to wrap your mind around how to organize your school counseling library. Check out this post to read about 15 Must Have Books for School Counseling and stay tuned for more counseling library posts where I share my favorite books. Don't forget to pin the image below to save this post for later!


